Page 2 of 2
Re: Ole Yellar rust repair
Posted: Thu Mar 21, 2013 9:14 pm
by 1Gary
This is pretty much the final cutout avoiding the bead on the floor pan because I don't have a bead roller. Just some minor clean up,but not much. Oh I found out how I could make the bead without a bead roller,but that is another thread sometimes later.
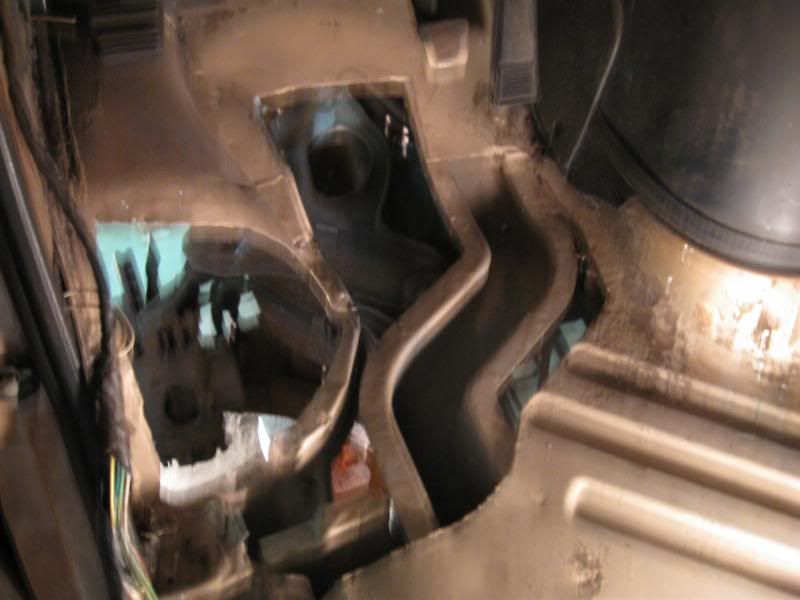
You see the triangle cut out on the actual radius of the wheel well?. It has a number of compound curves in the bend of it. For me to have this a invisible repair is very important because of the 3" lift it would be very visible so I am treating it just like a side panel of the van.Butt welded and has to have tight seams. I made out of construction paper a template.I have some cut-out panels to use as test pcs.I then realized I didn't have a damm thing that was round in the whole shop other than tires.I tried all I could to get a perfect smooth round shape with what limited body hammers I have and not having a shot bag or a plastic body hammer.What I ended up with was a divot'ed,bent,creased pc of junk.Not anywhere near what I wanted.
I went to the salvage steel place I go to for materials to get some partial sheets of good 20 gauge.I already have 18 gauge in inventory and the OEM size is 19 gauge which is very hard to find and very,very,expensive.I thought while I am there I would look to buy short pcs of round stock/pipe,if not for this job,just to have around the shop.
At first I guessed at the radius I needed and bought the smaller thick wall pipe.
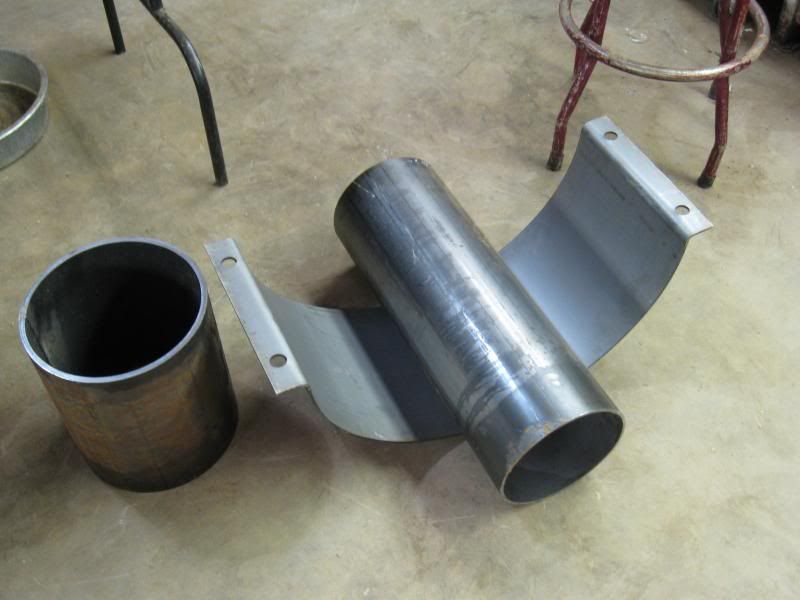
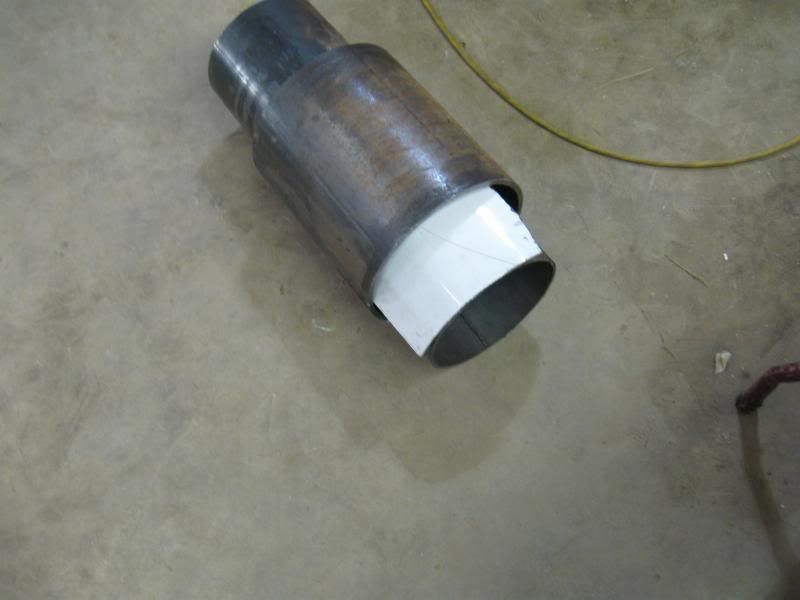
Well it worked out to be too small/tight of a radius.I spotted the big pc with the holes in it while I was there,but did buy it until I went back to buy the other two pcs.How a E-wheel works it is to roll the metal over two anvils forcing the pc to bent smoothly.
Thought about not being ready to spent acouple of grand for a E-Wheel.So how about some backwoods tech??. Got back to the shop,cut another test pc 19 gauge.Found just by luck the smaller pipe slid inside the larger pipe.
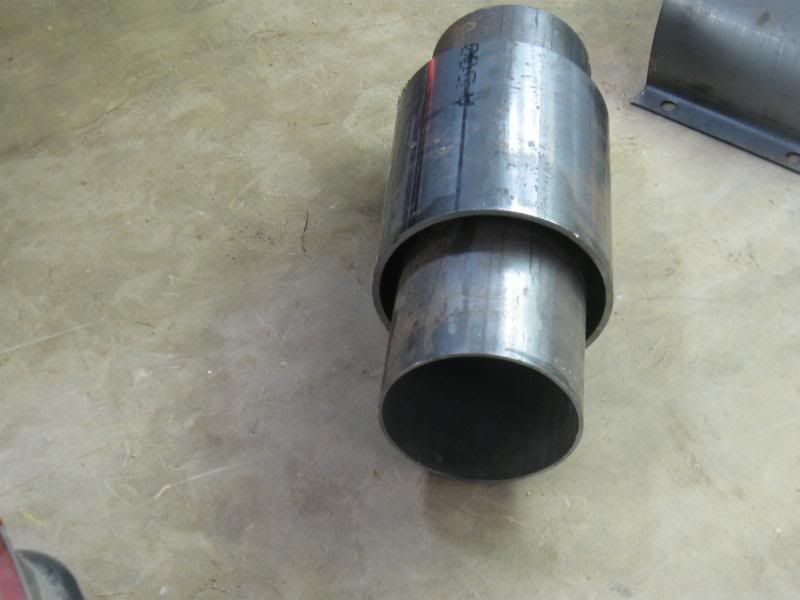
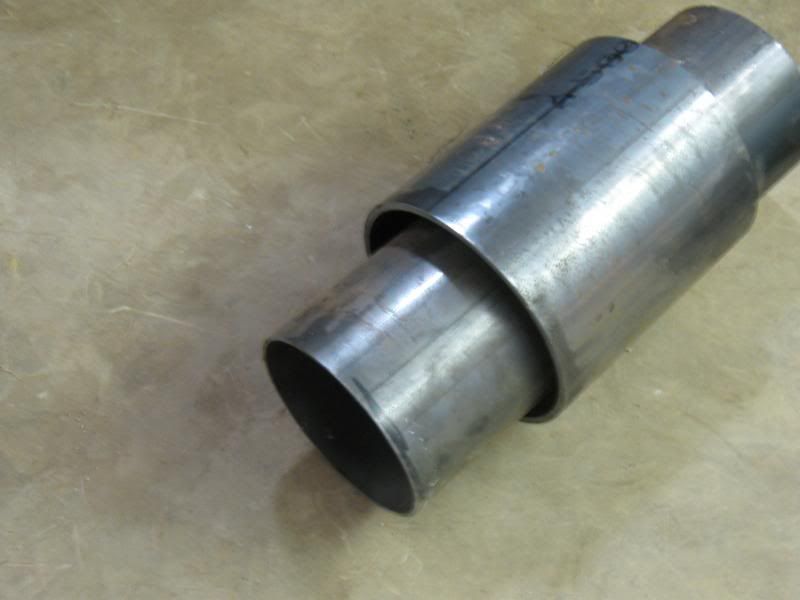
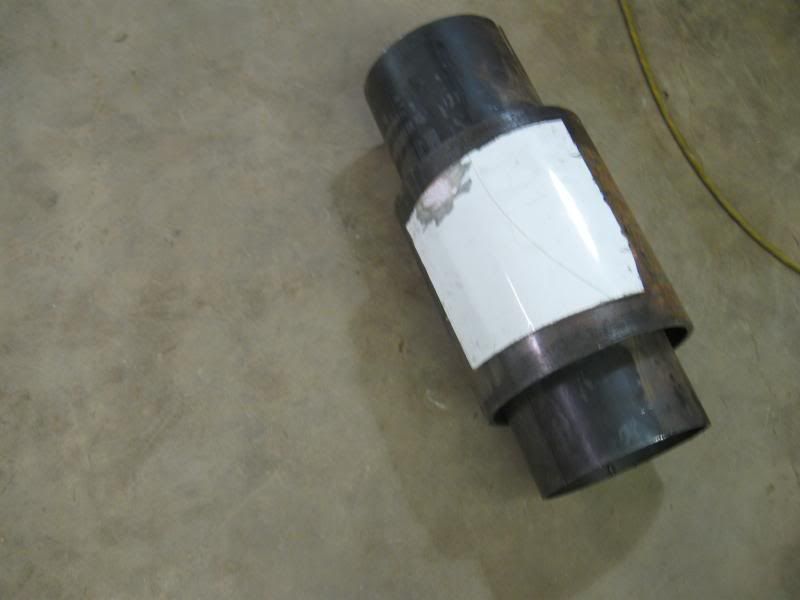
So I took the test pc I cut I took and put it inside the larger pipe.Then gently bent the pc enough so I could slide the smaller pipe through.I took the smaller pipe and pounded it down on the test pc while rolling the big pipe.Same thing,well sort of,as a E-Wheel.The result was a smooth good radius the same size as the larger pipe.
Re: Ole Yellar rust repair
Posted: Thu Mar 21, 2013 9:37 pm
by 1Gary
The largest pc I bought would work with the same principle.
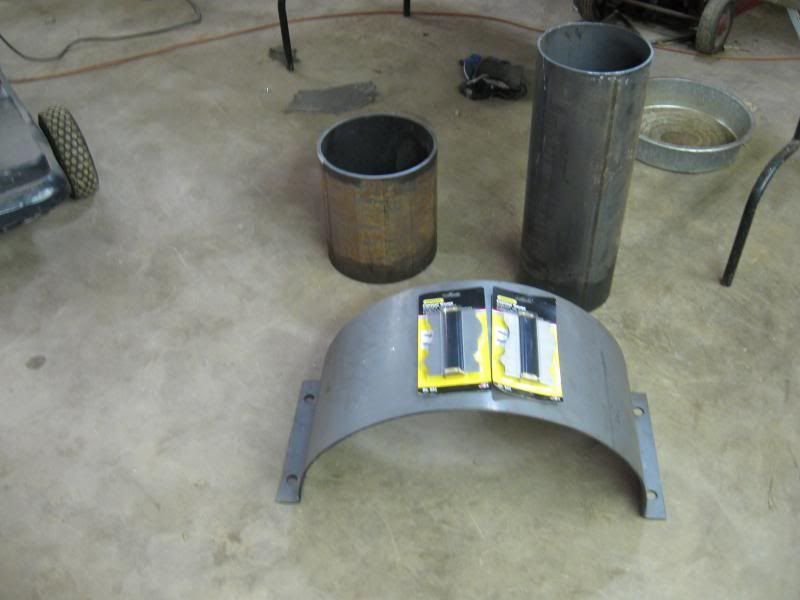
Those are contour gauges on top of it to make a very exact buck to not have to go back and forth to check the fit of the repair panel.
Yrs ago I made a portable work table out of square tube with a extension simply square solid pcs slide inside the tube.I'm going to get some more solid square pcs to slide in the work table to make working with this larger radius pc easier.

Going to bolt it either upside down or right side up depending on which way I need the bend.
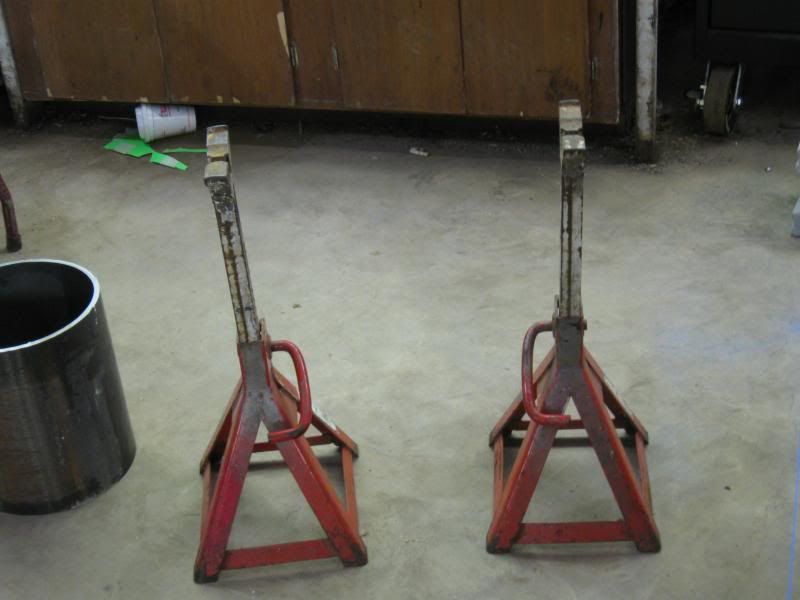
I finally found the 12ton jackstands in CL that I have been looking for.Increased height is what I was after.
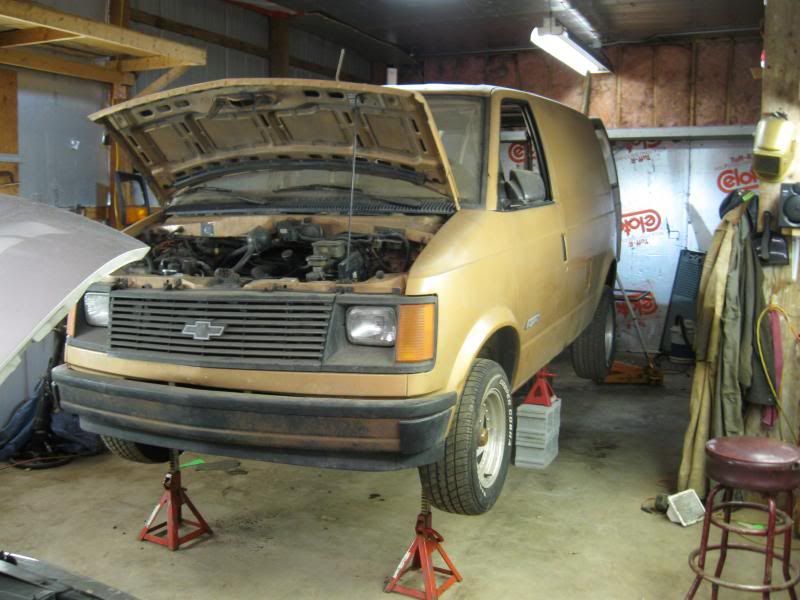
So instead of Ole Yellar beening parked in the back of the shop,it got moved more towards center stage in the shop.
Yeah man!!!. Yesterday was a good day.Solved some problems and got to work on Ole Yellar.

Re: Ole Yellar rust repair
Posted: Fri Mar 22, 2013 5:49 am
by LiftedAWDAstro
It's nice to see you working on the beast! Just keep that momentum up.

Re: Ole Yellar rust repair
Posted: Fri Mar 22, 2013 7:49 am
by mdmead
Cinder blocks Gary?! (At least turn them and cap them!)
Don't get crushed!
Re: Ole Yellar rust repair
Posted: Fri Mar 22, 2013 11:17 am
by 1Gary
Ran short on them Matt.That's temporary.The other side has 6 turned,so I got to get 4 more.Meantime there is the bumper jack on the back.
Re: Ole Yellar rust repair
Posted: Fri Apr 26, 2013 7:01 am
by LiftedAWDAstro
Updates? Weather has been nice...
Re: Ole Yellar rust repair
Posted: Fri Apr 26, 2013 11:22 am
by 1Gary
Actually the weather has been screwing with me.Still kerosene heat weather where everytime I open the door it costs me $10 bucks in kerosene.Next wk 60's/70's.Wooo-Woo.
Really didn't want to buy kerosene and end up in the can for the whole summer..............
Now Deano,one might think this is a poke for asking Matt about his shop

.Na.Couldn't be that.


Re: Ole Yellar rust repair
Posted: Fri Apr 26, 2013 1:31 pm
by LiftedAWDAstro
Might be!
Re: Ole Yellar rust repair
Posted: Sat Apr 27, 2013 12:28 pm
by doyoulikeithere
Hey Gary,
Nice to see you back at work on your beast !
Good for you. I'm trying to get back to mine as well.
Got my gearboxes and engine overhauled and gotta re-fit them into the 5 speed van.
Heres to warm days ahead.

Re: Ole Yellar rust repair
Posted: Sun May 12, 2013 5:15 pm
by 1Gary
After a number of attempts,as of today,I think I finally have a workable template.
Re: Ole Yellar rust repair
Posted: Sun Jun 30, 2013 9:16 am
by 1Gary
Well I think I got the main flooring rust repair panel ruff cut.The batteries in the camera needed replacing so maybe later tonight I can post some shots of what that is going to look like.To be honest I took the easier repair on first because the wheel well repair is still not working out like I want it.I can't decide if I want to make a buck to form it or not yet.It seems like all the little things like plastic hammers,dows,sandbags,that are holding me up.Not even expecting to buy a E-Wheel to finish this job.(but once getting a decent 220 mig would put me in a much better position to build a E-Wheel)Mean time,I am doing what I can with what I have.
Yeah-excited to get back on this project.................
Re: Ole Yellar rust repair
Posted: Wed Jul 03, 2013 11:36 pm
by 1Gary
Well I didn't post the pix's because I blew the weld on the panel I was working on.Guess I forgot how long it's been since I have had a welder in my hands.Gezzz thinking back now it's been yrs.The combination of low lighting,steering column and brake peddle in my way contributed to this failed attempt as well.So tomorrow I am going back to either grind out what is in there now or the top part of it anyways.
I use both hands while welding and giving I don't have a auto-dark welding helmet working in a tight space makes it hard to nod down the helmet.So I called my Miller welder dealer to price out a new auto dark helmet.Going to go look at them on Monday.
The steering column that's in the van has to come out anyways for the tilt,cruise control,delay wiper column, I have for it.That one needs some TLC for the return spring.So I have to take that one apart and either replace the spring or repair it.
The brake peddle isn't that big of a deal to remove and get me more room to work with either.Might as well get that done while I wait to see what I'm going end up with a auto dark helmet on Monday.
Certainly the proper way to do this is to drop the sub-frame-engine/trans out of the van to give me maximum excess to the bottom for welding.This too has to be done at some point and me wanting to recreate what GM built on this floor board may lead me to doing that as well.Still thinking about that some and how that would work out at this point.
Re: Ole Yellar rust repair
Posted: Fri Jul 05, 2013 10:20 pm
by 1Gary
Had a repair panel in there and didn't like it.Holding high standards in that it has to be a disappearing repair.So I ground it out and working on a do-over.
Wouldn't know it,the welder wire drive is acting up.
Re: Ole Yellar rust repair
Posted: Sat Jul 13, 2013 5:53 am
by 1Gary
Went back on this yesterday and got more 18 gauge for the floor pan part of the repair.
The last attempt to use my 110 welder acted like the wire drive motor went bad.And that was after I wire brush cleaned the contact tip. Rapid spark and problems adjusting the drive speed(jammed) like the drive motor was seizing up.The nozzle I did clean,but is worn out of shape.Whoever had this welder before me had taken masking tape and built up the size of the end of the gun to twist it on the gun so it would stay on the gun.Remember this is a gas mig.
So I took off that tape and brought the contact point and nozzle to a Miller dealer.I found that I did have new contact points in the shop,but I wanted extra ones to have on hand.I bought a new nozzle that was as close as we could find to this imported welder and decided that because we couldn't find contact points to match up in length that I would sue the new ones I found in the shop.
Now I didn't know if I had gone beyond the duty cycle when I was having problems or the tip on it inside was dirty or truly the welder was shot.So I cut about 1/2" of rubber fuel line and put that on the gun and then twisted the old nozzle over that.Yaaaaa that worked out ok even through the nozzle is worn a-tad bigger than it should be.That along with a new tip.Tried some test welds and laid down some decent test welds.Should am hoping it continues to work as it should.
So back to outlining the template to cut out a fresh pc for the floor board repair.